
Cosplay LEDs: Arduino Circuit Diagram
I’ve done a few cosplay LED projects so far and have had good success with the reliability of my LED circuit setup. I’m to a point where I am comfortable sharing some more about the circuit I have been using! So I proudly give you a legit circuit diagram for my recent cosplays!
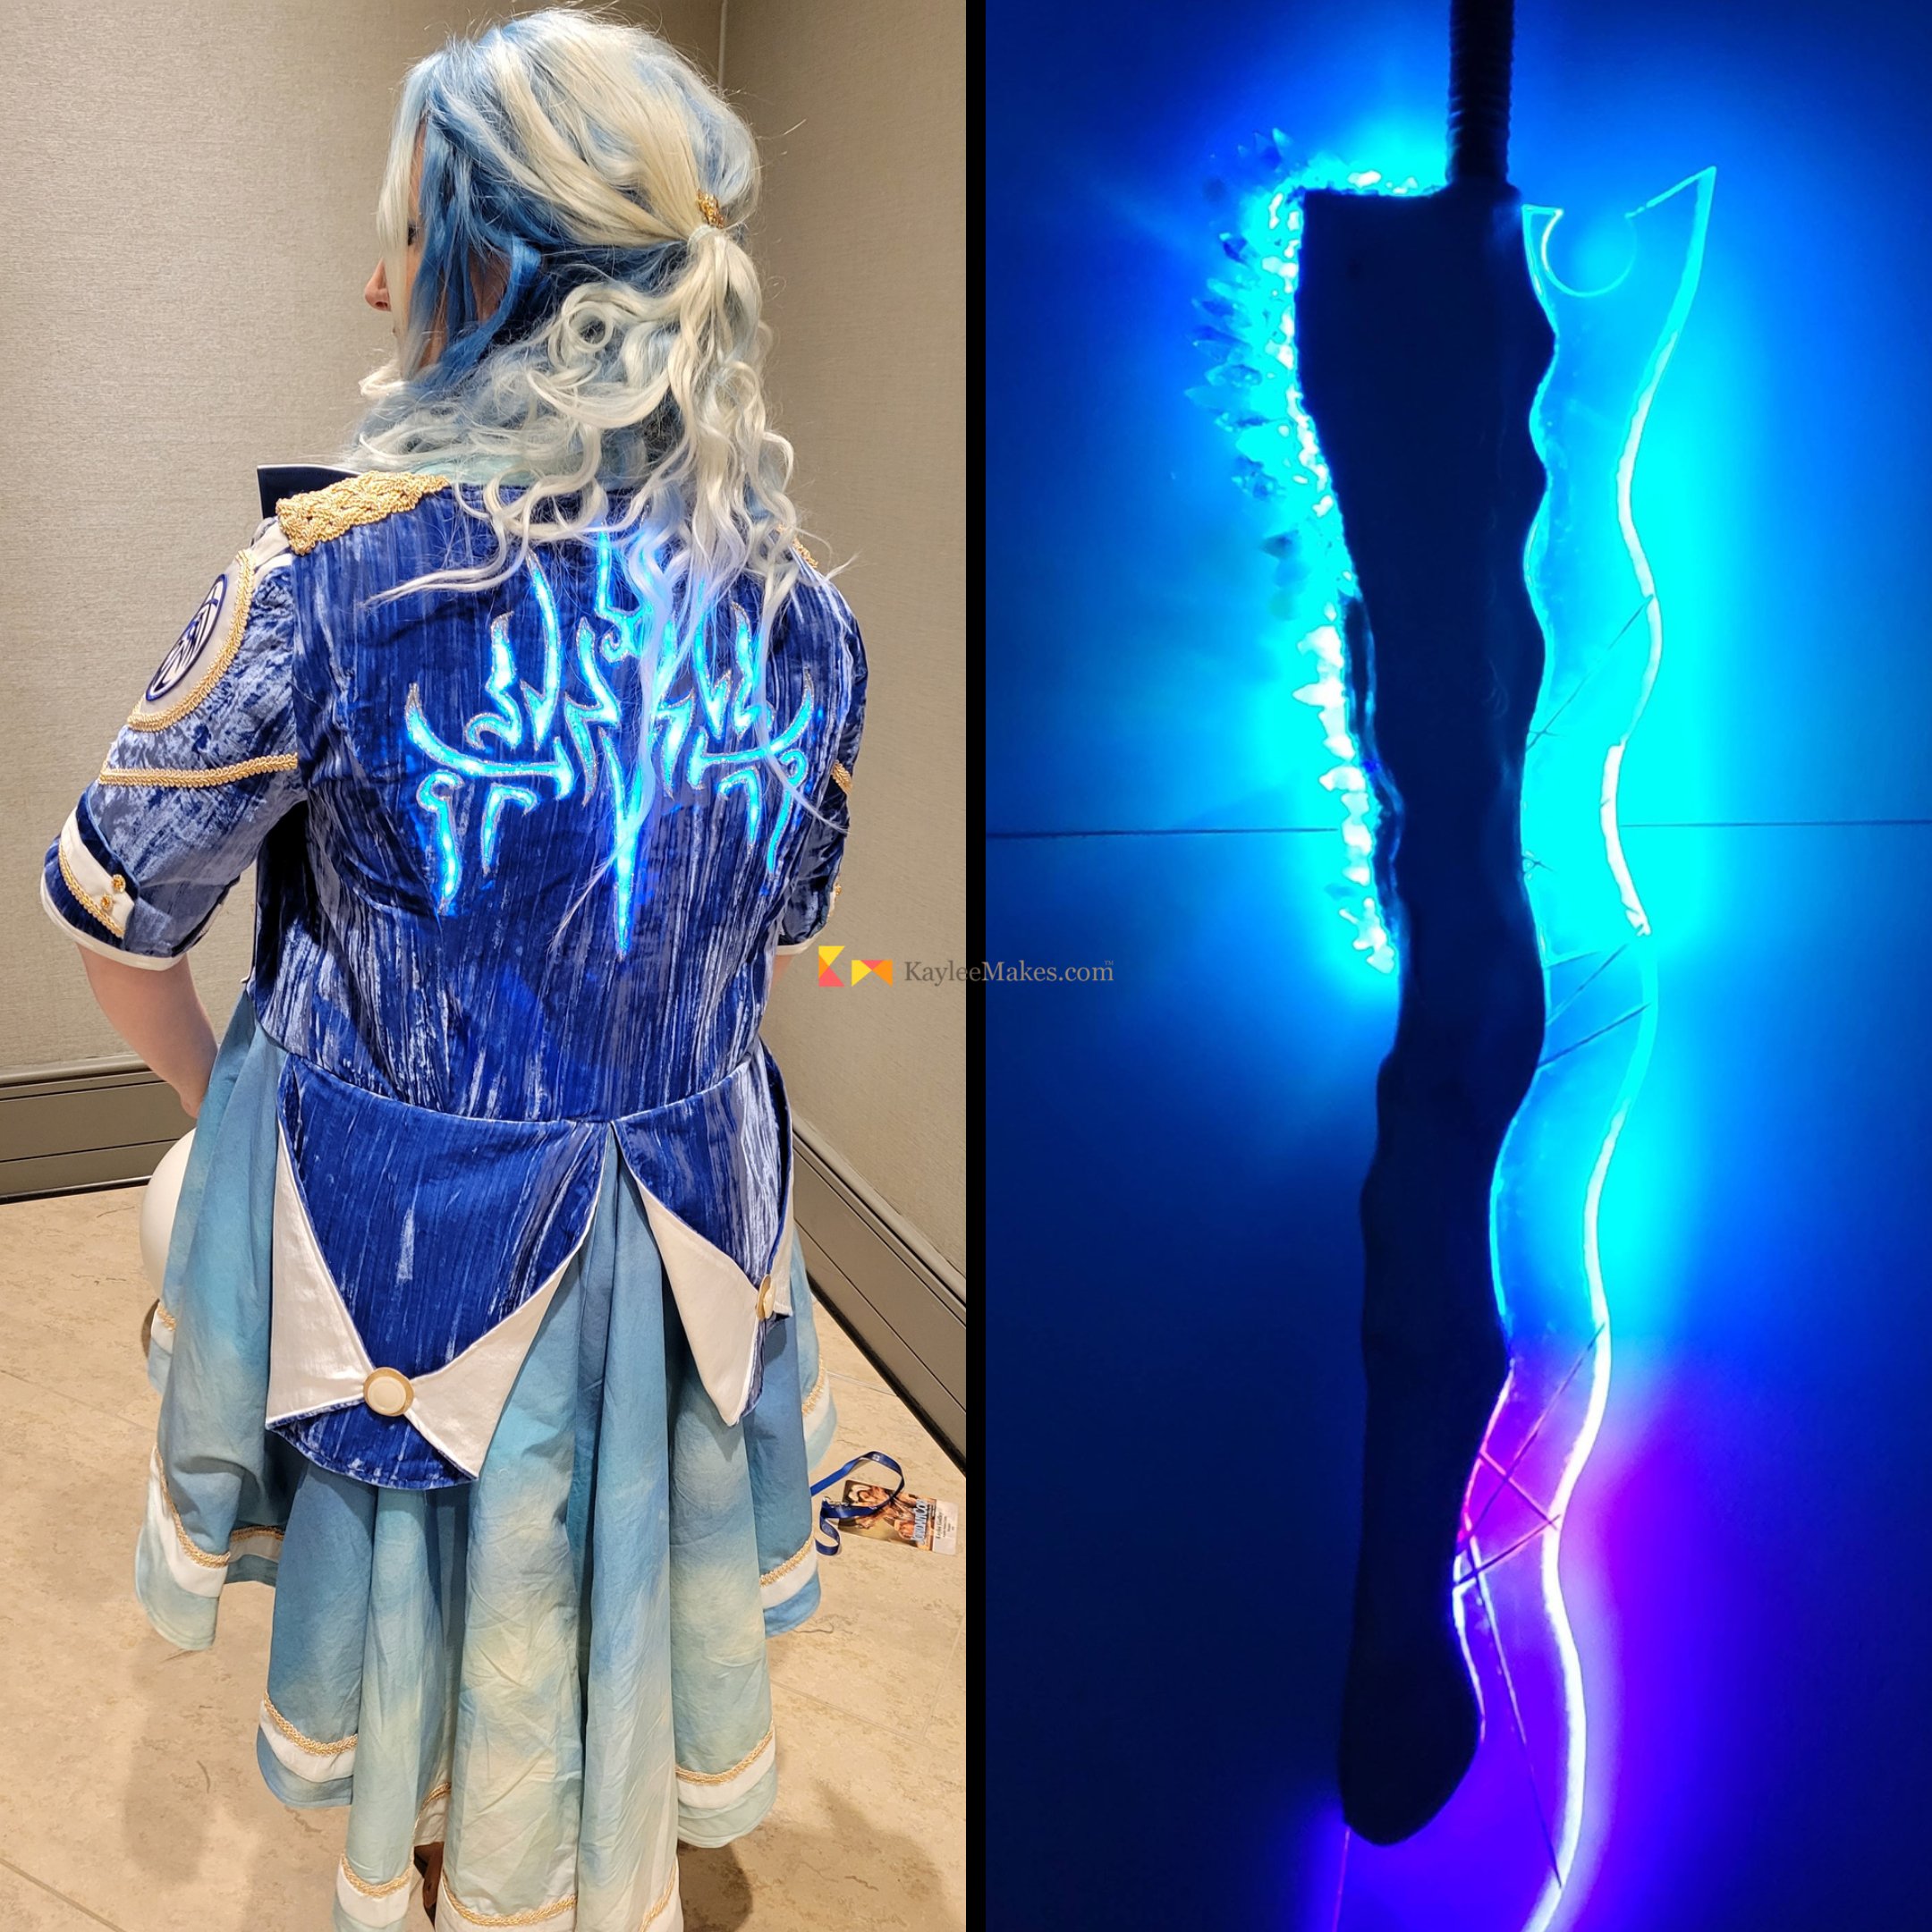
This is the circuit design I used on my large Shardblade. Mayalaran AND the Wind Runner Glyph on the back of the coat on my Syl cosplay. Both of these cosplays are from the Stormlight Archive books by Brandon Sanderson. Both of these Cosmere Cosplays have animated LEDs run by an AdaFruit ItsyBitsty microcontroller.
Supplies:
LEDs in the length needed. For this project, I used Adafruit NeoPixel Digital RGB LEDs. The Neo Pixel LEDs I have used 60 LEDs per meter. I feel like this is a good density for the cost and these can be bright.
I’ve been fine supporting about 120 LEDs on the circuit so far. The buck doesn’t get too hot, and the reliability is good from what I've experienced.
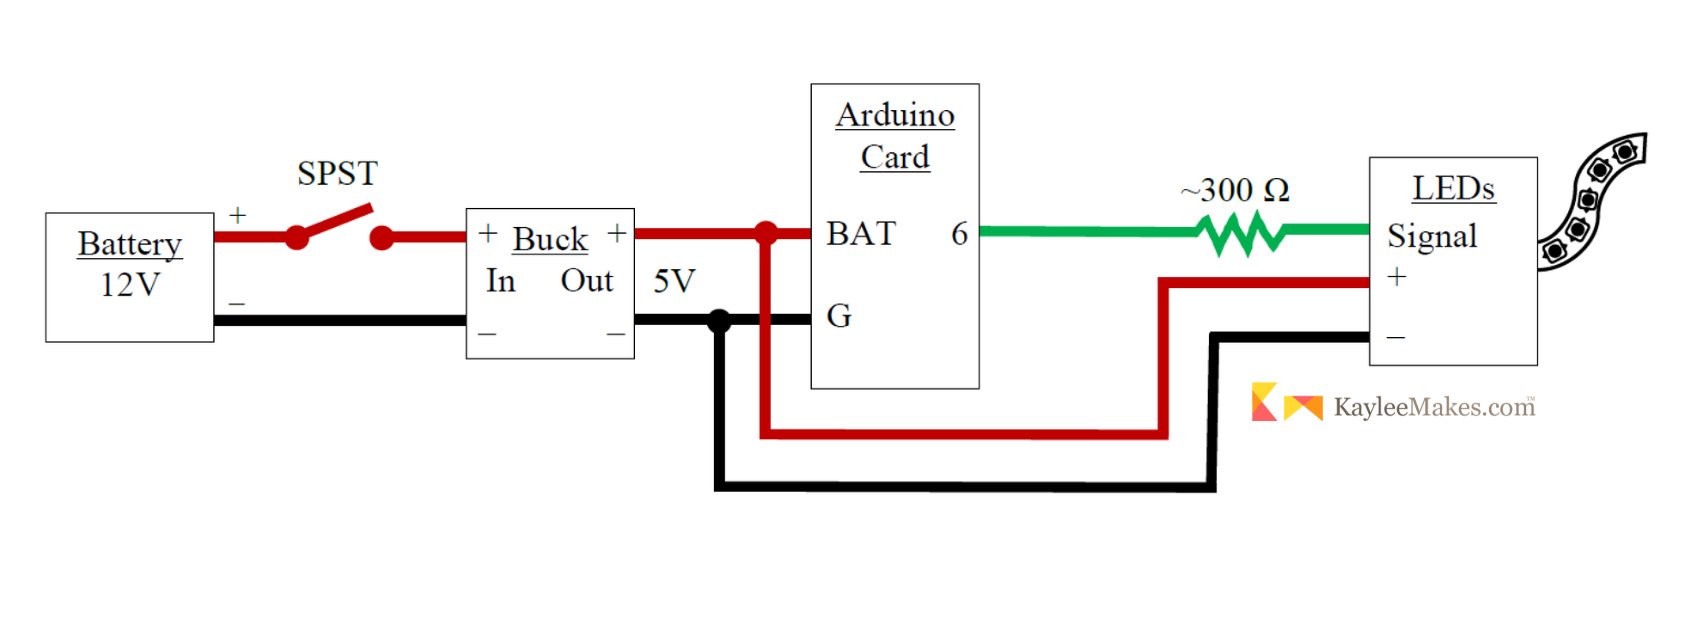
Stranded wire - I used 22 gauge stranded wire. I suggest using three different colors, one for power, ground, and signal. I used red for power, black for ground, and green for signal.
A 300 ohm resister - this needs to go in line with the signal placed close to the LEDs (not close to the microcontroller) to help protect from burn out in extreme cases. (I’ve never had this problem though.) I also suggest soldering it with some jumper wires into the circuit, rather than soldering the resister directly onto the signal of the LEDs. I have found that to be a weak connection. Much better luck soldering with stranded wire onto the LED strips.
Adadfruit Itsy Bitsy 32u4 is the kind of Arduino chip I used. Power in pin BAT, ground in pin G, and signal output in pin 6.
Stepdown buck to bring power for the board and LEDs down to 5V. Be sure to put this in the right direction. The buck I used had a little label to show power in and out.
I used a toggle switch with leads such as this tactile switch to turn the circuit off and on.
12v Power source - I am using Milwaukee 12v 2.5 Ah batteries which go into some nice tools that I already happened to own for home repairs. I bought some 3D printed battery adapters for my projects. I also have a Milwaukee charger for these batteries too.
Other supplies that are good to have on hand for your cosplay LED projects are general electronics supplies: eye protection, soldering iron and sponge, solder, flux, tweezers, de-soldering braid, wire strippers, flush cutters, an ohm meter, heat shrink, and zip ties.
Remember to use good electronics safety best practices too! Remember solder is hot and electricity is zappy!
I hope that my notes about what I have done for my most recent couple electronics LED projects. can help you too. Best of luck!