
DIY: Metal Vials for Aspiring Allomancers
For my Vin Mistborn Cosplay costume, I wanted to be sure to have plenty of metals at hand to fuel my Allomancy! I’d thought I would share some of the things I learned in a DIY tutorial video since I’ve made several iterations of these vials for my Mistborn cosplay. I hope you enjoy!
Supplies:

Glass Vials - Tim Holtz brand has several different kinds of small and tiny glass vials which come in a variety of shapes.
Foil flakes - These are shiny metallic flakes of very thin foil and are extremely shiny. This material is also used for gilding.
Metallic Chips - Metallic chips or small chunks like these for resin crafts added a nice granular looking effect to the vials.
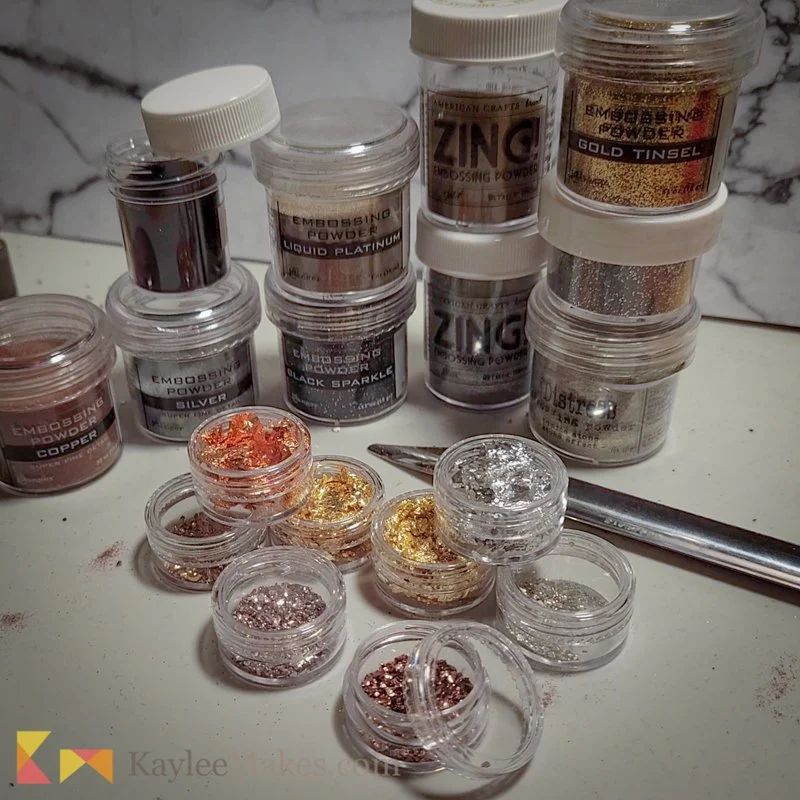
Metallic and Glitter Embossing powders. Here are some of my favorites:
Small silver beads that would fit into the vials
All purpose flexible glue
Other tools I used include a heat proof place for the glass vials to cool down, pliers, tweezers, coffee filters, and a bead scoop. I used a small plastic cup, pop sickle sticks, gloves, PPE, a plastic syringe, paper towels, and toothpicks too.
Here’s the obligatory disclaimer in the form of a poem!
Heat is hot,
Glass is sharp,
Please be safe when making art!


Process:
Alright now, let’s get down into some details that I found valuable when making these Mistborn inspired vials. I love all these fussy little details and tips when crafting, so I hope you find this valuable.
I chose to use vials for my Mistborn costume which are stoppered with a cork. However, I found other vials and test tubes some of which had rubber stoppers, or were threaded with plastic lids. The kind of glass vials used could really get fun depending on the kind of pretend apothecary or concoctions you are cooking up.
A combination of thin metal gilding foils, metallic chips, and embossing powders gave the metallic effects that I was wanting.
Embossing powders are neat because the are heat sensitive powders. Melt them and they become a blob. This is super useful.
Embossing powders are usually used for paper crafting and stamped images. They are added on top of an image stamped with a sticky ink. Pour the embossing powder over the sticky ink and then it’s melted with a heat gun. The result is a three dimensional embossed image raised up from the paper. I used glitter and metallic embossing
One of my most favorite embossing powders is Liquid Platinum by Ranger - it has a warm pewter color which is mellow and almost Champaign silver like. It’s a lovely look in the cosplay vials.
I used a precision heat gun - the nozzle of the heat gun is smaller and more focused than a typical heat gun found at the hardware store, but it works great for the embossing powders.
I did heat up the glass too much on a couple test vials and they cracked, so I would recommend not overheating the glass (like about more than 1 minute or so). I think it also depends on the kind of glass and the thickness of the glass which can affect how it takes the heat too. So, I ended up getting extra vials to play around with since I had a few crack.
The resin is optional: When I made an earlier set of these vials, I did not fill them with resin at first. And I had some of the glass vials break. They looked just fine, but since I sewed these vials onto the Mistborn Cosplay, I felt like the additional step of the resin in the vials helped make the glass less fragile. Also, the resin allowed the foil flakes to be suspended and look like they were floating around in the vials which I thought was cool.
I’m also pretty new to epoxy and resin and I’m learning they’re not the same and not necessarily interchangeable, so I wanted to clarify that I did use Pour Resin for this project.
One tip I figured out is that I tapped the vials gently on the table as I was adding resin to help the bubbles come up. I was pleased with the results and am okay with some super tiny bubbles. I was going for a liquid look, not a glass look so a few extremely small bubbles in the final cured resin didn’t bother me.
I also used a tooth pick to poke and stir the contents in the vials. That allowed some of the flakes and bits to look suspended which was a fun variation.
Oh yeah, don’t eat craft supplies. Allomancy is not real, but it’s fun to make pretend Mistborn props and get super excited about how these vials look! [dramatic mock steel push] Okay thanks!